Now that we have a sensor connected we need to expose the data to AWS sitewise
The most direct means I could find of accomplishing this was by installing an OPC UA server on the raspberry PI. So, on to another tutorial. To do so I ended up using http://node-opcua.github.io/#
At first this looked perfect
https://github.com/node-opcua/node-opcua/blob/master/documentation/monitoring_home_temperature_with_a_raspberry.md but I couldn’t quite get it to work…
So I ended up modifying the sample_server.js from https://github.com/node-opcua/node-opcua/blob/v2.1.3/documentation/sample_server.js
The Install
Assuming you are on raspbian:
- make sure to have nodejs and npm command installed
$ node --version
$ npm -version
installing node-opcua as a node package
$ mkdir mytest
$ cd mytest
$ npm init
$ npm install node-opcua --unsafe-perms
next edit (create) the sample_server.js in nano
$ nano sample_server.jsCopy the below and ctrl + X to write out the file.
/*global require,setInterval,console */
const opcua = require("node-opcua");
const readline = require('readline');
const fs = require('fs');
// Let's create an instance of OPCUAServer
const server = new opcua.OPCUAServer({
port: 4334, // the port of the listening socket of the server
resourcePath: "", // this path will be added to the endpoint resource name
buildInfo : {
productName: "MySampleServer1",
buildNumber: "7658",
buildDate: new Date(2014,5,2)
}
});
function post_initialize() {
console.log("initialized");
function construct_my_address_space(server) {
const addressSpace = server.engine.addressSpace;
const namespace = addressSpace.getOwnNamespace();
// declare a new object
const device = namespace.addObject({
organizedBy: addressSpace.rootFolder.objects,
browseName: "MyDevice"
});
// add some variables
// add a variable named MyVariable1 to the newly created folder "MyDevice"
let variable1 = 1;
// emulate variable1 changing every 500 ms
setInterval(increment, 500);
function increment() {
const readInterface = readline.createInterface({
input: fs.createReadStream('/sys/bus/w1/devices/28-01145ecb4ea5/w1_slave')
});
readInterface.on('line', function(line){
// exclude the 'YES' line, only process second line
if (line.includes('YES')){
// ignore
} else {
// split the t=
split = line.split("t=");
// convert to c
temp_c = split[1] / 1000.0;
temp_f = temp_c * 9.0 / 5.0 + 32.0;
variable1=temp_f;
}
});
}
namespace.addVariable({
componentOf: device,
browseName: "Temperature",
dataType: "Double",
value: {
get: function () {
return new opcua.Variant({dataType: opcua.DataType.Double, value: variable1 });
}
}
});
// add a variable named MyVariable2 to the newly created folder "MyDevice"
let variable2 = 80.0;
namespace.addVariable({
componentOf: device,
nodeId: "ns=1;b=1020FFAA", // some opaque NodeId in namespace 4
browseName: "Baseline",
dataType: "Double",
value: {
get: function () {
return new opcua.Variant({dataType: opcua.DataType.Double, value: variable2 });
},
set: function (variant) {
variable2 = parseFloat(variant.value);
return opcua.StatusCodes.Good;
}
}
});
}
construct_my_address_space(server);
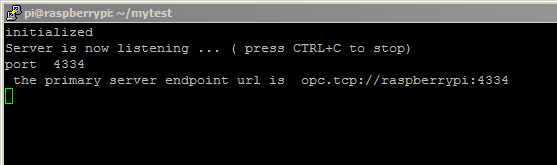
server.start(function() {
console.log("Server is now listening ... ( press CTRL+C to stop)");
console.log("port ", server.endpoints[0].port);
const endpointUrl = server.endpoints[0].endpointDescriptions()[0].endpointUrl;
console.log(" the primary server endpoint url is ", endpointUrl );
});
}
server.initialize(post_initialize);Some Niceties
install screen so you can detach from the session
sudo apt-get install screenrun the sample server using screen
screen node sample_server.js
| 1.Detach a terminal |
| CTRL + A release, and then press D |
| 2. List all terminal session |
| $ screen -list |
| 3. Reconnect screen |
| $ screen -r |
Assuming it works
Now that you have an opcua server running, its a good idea to try and connect to it. See that opc.tcp address, copy that out to use. (You might have to replace with the ip address if you don’t have DNS resolution)
Then download the commserver opcua client http://www.commsvr.com/Products/OPCUAViewer/tabid/520/language/en-US/Default.aspx you have to fill out a registration (annoying) but other than that its pretty easy.
Start the application, paste in the address, and hit connect. Set all the security to none
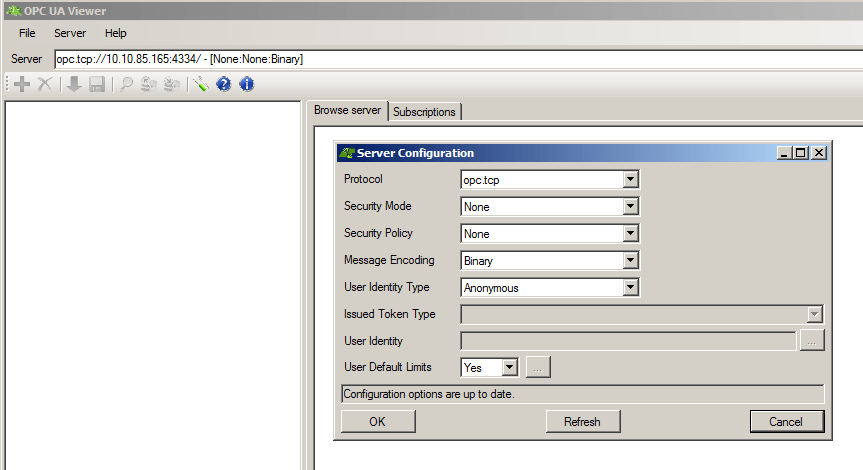
Hit OK,
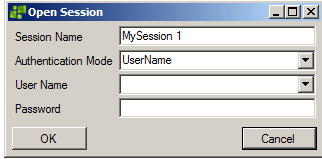
Then Hit OK again. If everything worked you should see this
When it complains about the certificate, hit yes to trust it. You should see something like this
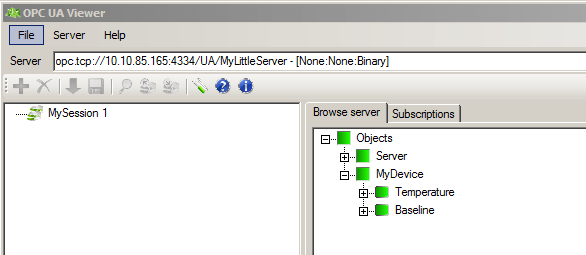
Right click on Temperature, subscribe, new, and then OK
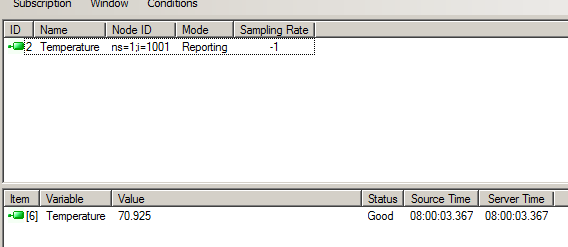
If you grab the probe you should see the value of the Temperature change.

[…] https://michaelellerbeck.com/2020/01/10/aws-iot-sitewise-with-raspberry-pi-temperature-sensor-ds18b2… […]