Now that we have a gateway that has greengrass and an opcua server and temp sensor next we need to get the sitewise metadata setup and then the sitewise connector and gateway.
Sort of following this https://aws.amazon.com/blogs/iot/collecting-organizing-monitoring-and-analyzing-industrial-data-at-scale-using-aws-iot-sitewise-part-1/ but with my own twists.
On the gateway create these folders
sudo mkdir /var/sitewise
sudo chown ggc_user /var/sitewise
sudo chmod 700 /var/sitewise
On the gateway check that you have Java 1.8 and create the symbolic link or else you will get a failed error: unable to create worker process for arn:aws:lambda:us-east-1:aws:function:swCollector:7. cannot find executable java8 under any of the provided paths [/usr/bin /usr/loca
- Make sure that your EC2 Linux instance has the pre-requisites as noted, specifically the following:
- x86 64-bit architecture
- OpenJDK 8 (not an earlier or later version). Execute
sudo yum install java-1.8.0to install the required version (if needed). On Raspberry PI this issudoapt-get installoracle-java8-jdk
- To allow AWS IoT Greengrass to use Java, you need to create a
java8symbolic link to the Java executable (if not already setup by the Java 8 installation earlier). Executesudo ln -s /usr/bin/java /usr/bin/java8to create the symbolic link (if needed). Executejava8 -versionto validate the symbolic link pointing to 1.8.x version.
Create an IAM Policy and Role
Basically do this https://docs.aws.amazon.com/iot-sitewise/latest/userguide/configure-gateway.html#attach-iam-role
- You must create an AWS Identity and Access Management (IAM) policy and role to allow the gateway to access AWS IoT SiteWise on your behalf.
2. Then create a role
3. Then edit the trust relationship
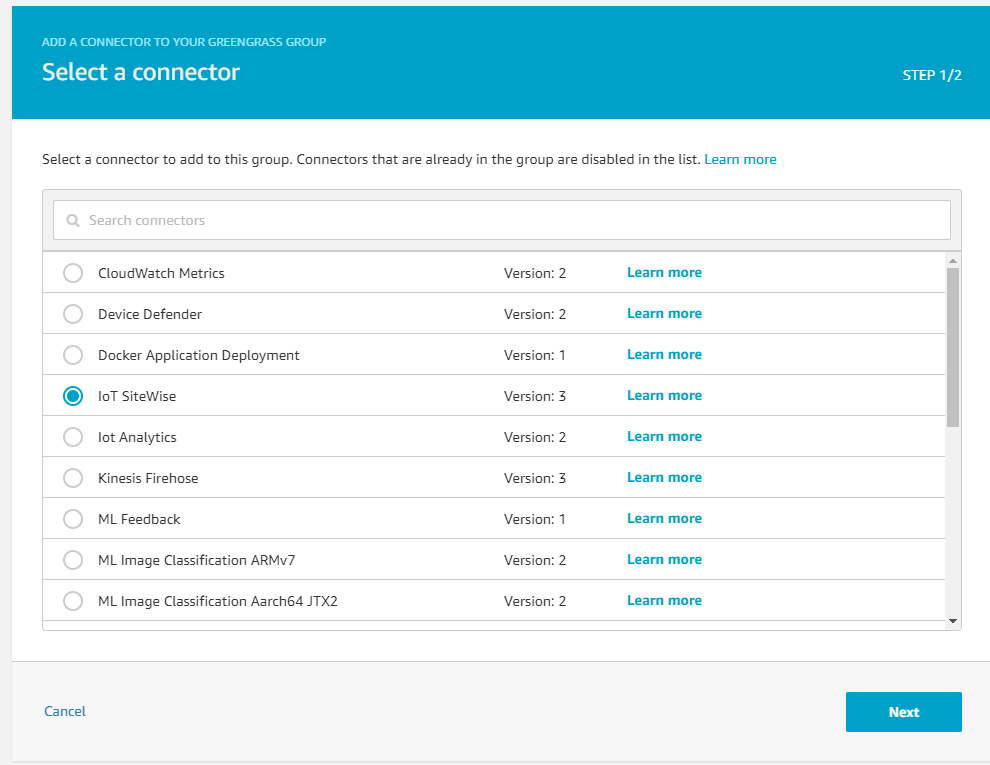
4. Add a connector
Enable the AWS IoT SiteWise AWS CLI
- Download the AWS IoT SiteWise service-2updated.json file.
- Navigate to the directory where you downloaded the service-2updated.json file.
- From a command prompt, run the following command.
aws configure add-model –service-name iotsitewise –service-model file://
service-2updated.json
The aws iotsitewise AWS CLI commands are now available.
Note
After AWS IoT SiteWise is out of preview, the above procedure won’t be necessary. The AWS IoT
SiteWise commands will be accessible through the various AWS SDKs and the AWS CLI.
Create an asset module (template)
I named it raspberrypi.json
{
    "assetModelHierarchies": [],
    "assetModelDescription": "RaspberryPI Model Template",
    "assetModelName": "RaspberryPI Model",
    "assetModelProperties": [
        {
            "dataType": "DOUBLE",
            "type": {
                "measurement": {}
            },
            "unit": "Fahrenheit",
            "name": "Temperature"
        },
        {
            "dataType": "DOUBLE",
            "type": {
                "measurement": {}
            },
            "unit": "Fahrenheit",
            "name": "Baseline"
        }
    ]
}
Create it using the CLI
aws iotsitewise create-asset-model --cli-input-json file://raspberrypi.json --profile defaultIt spit this back at me
{
    "assetModelId": "31835010-fa03-4104-8134-41798df2c464",
    "assetModelStatus": {
        "state": "CREATING"
    },
    "assetModelArn": "arn:aws:iotsitewise:us-east-1:751892709470:asset-model/31835010-fa03-4104-8134-41798df2c464"
}
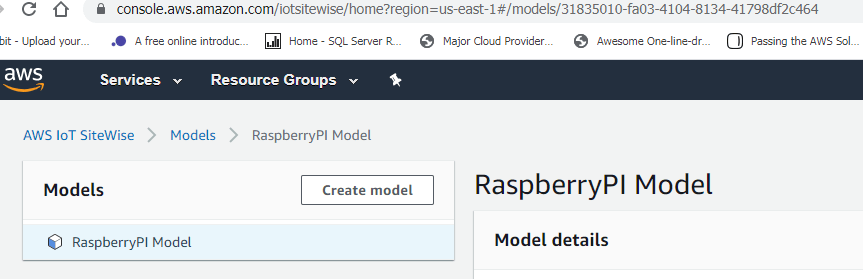
I opened up AWS IoT SiteWise > Models and hurray I can see it, I also note that the UID is in the URL so it looks like I could retrieve it again if needed.
Next we create an asset using the Asset Model (pass it the assetModelID from above)
aws iotsitewise create-asset --asset-name "RaspberryPI" --asset-model-id "31835010-fa03-4104-8134-41798df2c464" --profile defaultIt spit this back at me
{
    "assetId": "30337d6b-8409-4067-a69e-fab6b8a68271",
    "assetStatus": {
        "state": "CREATING"
    },
    "assetArn": "arn:aws:iotsitewise:us-east-1:751892709470:asset/30337d6b-8409-4067-a69e-fab6b8a68271"
}
Next navigate to AWS IoT SiteWise, Assets, RaspberryPi, and then hit edit
For baseline use /MyDevice/Baseline
For Temperature use /MyDevice/Temperature
And set Notification status to ENABLED for both

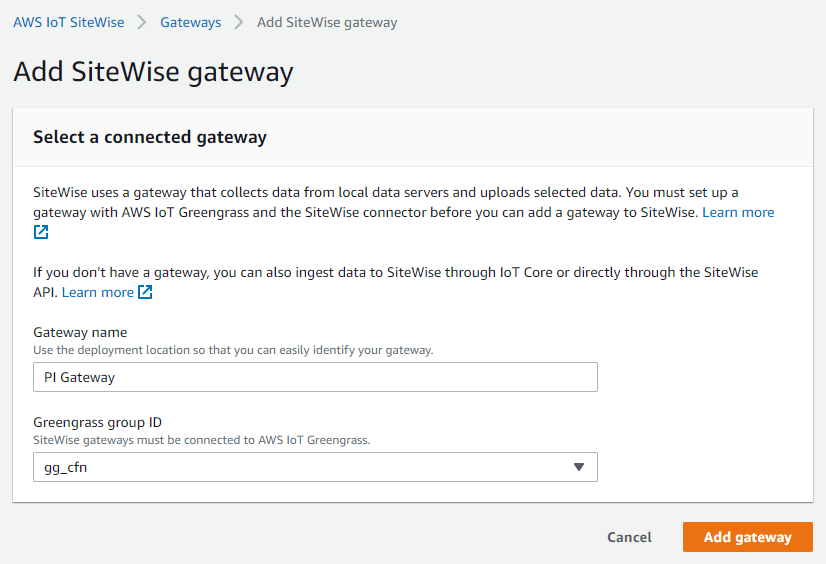
Ingesting data using AWS IoT SiteWise gateway
Now that you have the asset model created, set up your AWS IoT SiteWise gateway in the cloud to start the data ingestion into AWS IoT SiteWise.
- Navigate to AWS IoT SiteWise, Ingest, Gateways and click on Add gateway to create a new SiteWise Gateway named PI Gateway with Greengrass group ID as gg_cfn. Click on Add gateway once done.
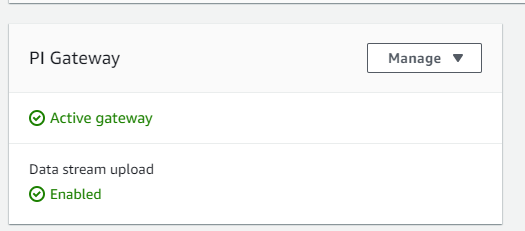
Once the SiteWise Gateway is created successfully, you will see below:
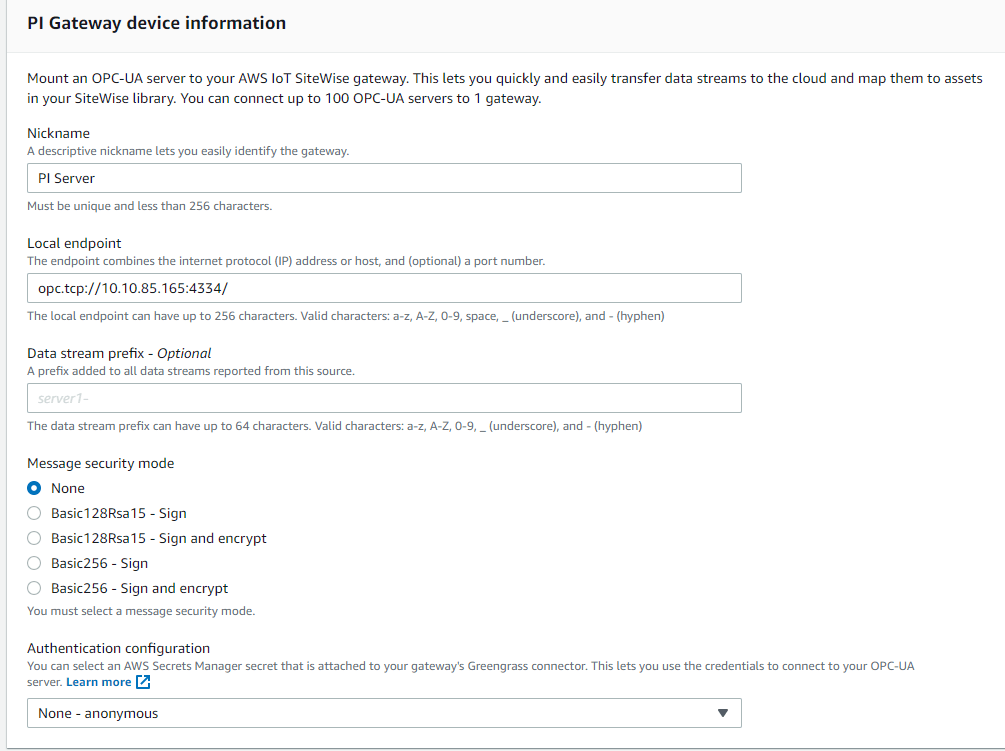
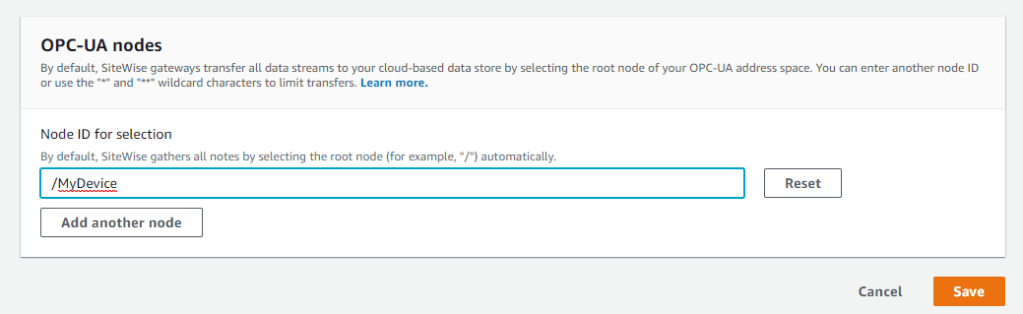
You are now ready to add a source (the OPCUA server running on our PI) for the AWS IoT SiteWise Gateway you just created. Click on Manage, View Details, New source to add your source OPC-UA server details. Click on Save to save the details. Note that you can add multiple sources to the same gateway.
The proof is in the pudding
Assuming it all worked, you can navigate to AWS IoT SiteWise > Assets > RaspberryPI
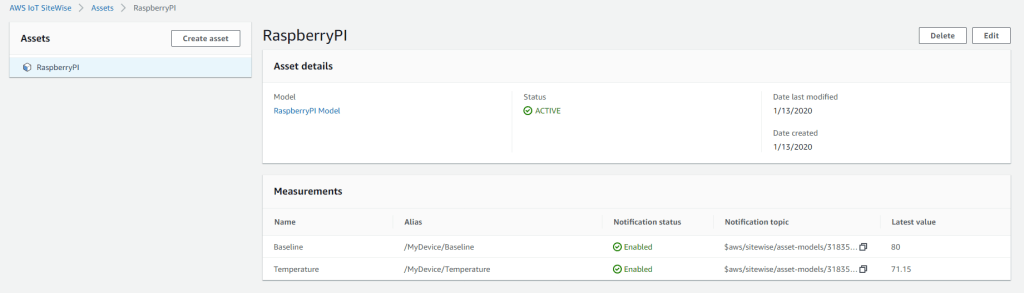
And you should be able to see your Temperature, if you touch the probe and refresh you should see the value increase.
On to part IV https://michaelellerbeck.com/2020/01/15/aws-iot-sitewise-with-raspberry-pi-temperature-sensor-ds18b20-part-iv/

[…] Part III https://michaelellerbeck.com/2020/01/14/aws-iot-sitewise-with-raspberry-pi-temperature-sensor-ds18b2… […]